Setting Up Snowflake
Access this link to start a free trial of Snowflake. Upon activating a trial account, you will be prompted to select the cloud provider from either AWS, Azure, or Google. Once your account is created, you will be able to create data warehouses, databases, and data tables, and you can start loading and querying data.
Configuring an ODBC Connection
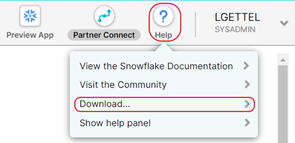
Before starting Alteryx, the ODBC connection needs to be configured. To start, log in to your Snowflake account, go to “Help,” and then “Download.” From the Downloads pop-up, select ODBC Driver and the Snowflake repository. In the new tab that opens, select the driver type and version to download.

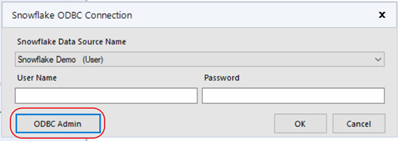
In Alteryx, add an Input Data tool to the canvas. When selecting the data connection, go to data sources, then select the Snowflake ODBC connection. In the pop-up, select ODC Admin.
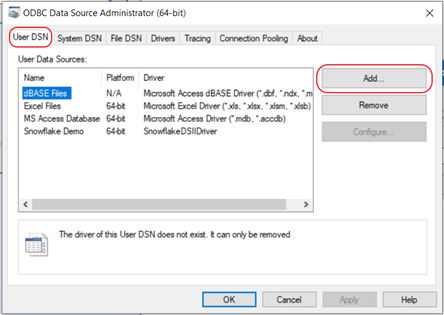
Within the User DSN tab, select Add.
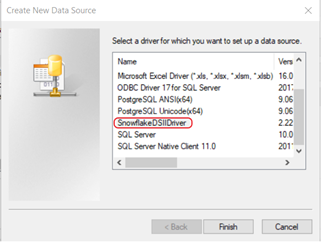
Select the Snowflake driver from the list, and then hit finish.
In the next window, you need to fill out the username, password, server, and warehouse. The server is your Snowflake URL until the first back slash after the .com.
![]()
By default, the trail account is created with a COMPUTE_WH warehouse; this name will be input into the warehouse value. After selecting OK and applying the configurations, input the username and password into the data connection prompt and click OK. A new window will appear, allowing you to select what tables and fields to read into the Alteryx workflow. The ODBC connection you created will be stored. Whenever you add a new input tool to access the database, Alteryx will ask for credentials.
Writing Data into Snowflake
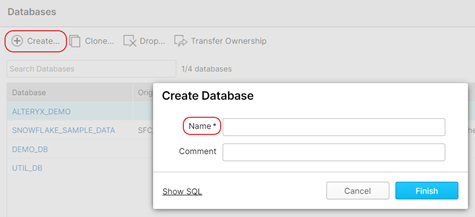
To start building an Alteryx workflow, first create a new Snowflake database to write data into. To do this, login to your Snowflake account and go to the “Databases” page. Click “Create,” then assign the name of your database.
Now, in an Alteryx workflow where you want to export the data to Snowflake, add an output data tool. Choose Snowflake ODBC as your source and input credentials, and then provide a data table name. For the table name, you can provide the name of an existing table, or if you input a new name, Alteryx can create a new data table. The configuration of the output data tool can specify to create, append, overwrite, or delete and append. In the pre-create SQL statement you can designate which database the table is in, the syntax is “use databaseName.”
Reading Data from Snowflake
One way of reading in data is using the input data tool with the data source Snowflake ODBC chosen and the connection. Another way of pulling data into a workflow is using the Connect In-DB tool. Within this tool, you can quickly connect to a preconfigured database. Both methods produce a database tree with check boxes that eliminate the need for SQL knowledge and make it easy to select what data to import.
You would use the Connect In-DB tool when you want to apply changes to tables within Snowflake without having to import and export the data to Alteryx. Note that the Connect In-DB tool will only permit connections to other in-database tools; it will not connect to standard tools. To integrate the in-database tools with standard tools, you can use the Data Steam Out tool to import data into the workflow. This data can then be processed using typical tools.
Ready to get started with Alteryx and Snowflake? Download the Snowflake Starter Kit today!